Linux on Windows 10 with support for GPI: An Easy way for reading and converting Philips MR rawdata
(Note: a video version of this tutorial is available at this link)
The installation of a Linux Distro on a Windows 10 operating system is outlined using Windows Subsystem for Linux (WSL) feature. Instructions on how to install GPI (Graphical Programming Interface) in the Linux Disrto under Windows 10 and how to convert the proprietary and standard Philips MR rawdata, imaging and spectroscopy data to NumPy data are shown below.
Prerequisites and Installed Software list
-
Prerequisites
- Windows 10 Professional (Enterprise / Home) with version 1607 (OS build 14393) or above
-
Software installed on Windows 10:
- Windows Subsystem for Linux (WSL)
- ‘X’ windows server (such as Xming or MobaXterm or VcXsrv)
-
Software installed inside the Linux environment (under WSL):
- Conda (miniconda) – a cross-platform and cross-language package manager
- GPI (Graphical Programming Interface)
- ReadPhilips nodes and networks for GPI
Windows Subsystem for Linux (WSL)
Introduction to Windows Subsystem for Linux (WSL)
The Windows Subsystem for Linux (WSL) is a new Windows 10 feature (made available in a 2016 Windows update) that enables native Linux command-line tools directly on Windows, alongside the traditional Windows desktop and modern store apps. WSL is a collection of components that enables native Linux ELF64 binaries to run on Windows. It contains both user mode and kernel mode components.
It is primarily comprised of:
-
User mode session manager service that handles the Linux instance life cycle
-
Pico provider drivers (lxss.sys, lxcore.sys) that emulate a Linux kernel by translating Linux syscalls
-
Pico processes that host the unmodified user mode Linux (e.g. /bin/bash)
By placing unmodified Linux binaries in Pico processes, thus enabling Linux system calls to be directed into the Windows kernel. The lxss.sys and lxcore.sys drivers translate the Linux system calls into NT APIs and emulate the Linux kernel on Windows.
In May 2019, Microsoft announced the newest architecture for the Windows Subsystem for Linux (WSL2). It will be released as a Windows Insider Preview in late-2019 and later will be incorporated into native Windows build in the future releases. (Source:https://blogs.msdn.microsoft.com/wsl/2016/04/22/windows-subsystem-for-linux-overview/, https://devblogs.microsoft.com/commandline/announcing-wsl-2/ and https://docs.microsoft.com/en-us/windows/wsl/wsl2-install)
WSL depends on the Windows 10 Build version
It is important to understand that Windows adds, updates, and removes features with each new major update (version or build number change). WSL was first introduced in Windows 10 version 1607 (OS build 14393, first made available on 2016-08-02). While the more recent version of Windows 10 is 1903 (OS build 18362, released on 2019-05-21).
Checking Windows 10 Build version
To confirm your current Windows version, follow the step below
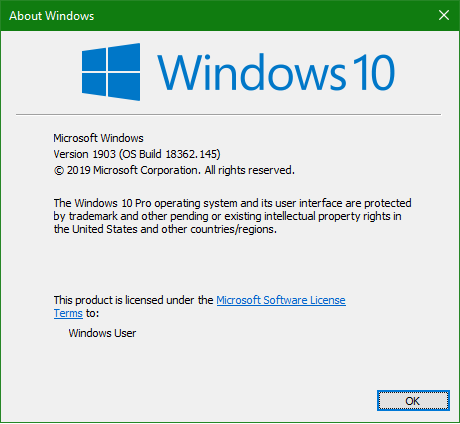
Method 1: Using “winver” command
Press “Windows Key” + “R” simultaneously
Then type “winver” and hit “Enter Key” and note the output
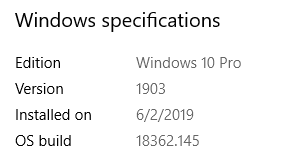
Method 2: Using “About PC” functionality
Press “Windows Key”, type “About your PC” in the search space and hit “Enter Key”.
A window with your system information will open showing you the Windows Edition and version number.
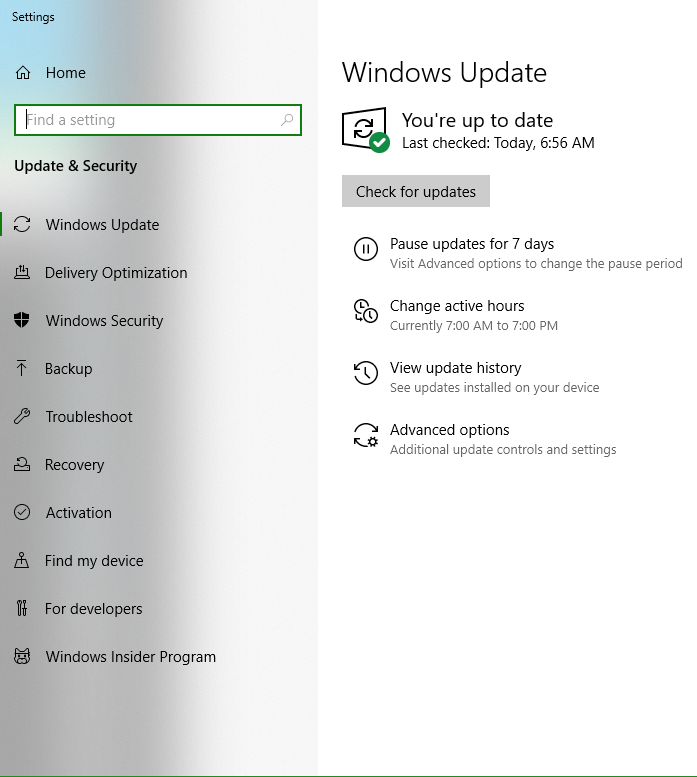
Updating to the latest Windows Version
Press “Windows Key”, type “Check for Updates” in the search space and hit “Enter Key”.
Checking if the WSL is enabled
First check if the WSL is already enabled in your Windows operating system
Step 1: Open Powershell as “Administrator” (right-click on the icon and select option “Run as Administrator”)
Step 2: Run the following command
DISM /online /get-features /format:table | Select-String -Pattern "Linux"
If is output shows “Microsoft-Windows-Subsystem-Linux | Enabled”, then WSL is enabled in Windows.
If is output shows “Microsoft-Windows-Subsystem-Linux | Disabled”, then WSL is not enabled in the Windows and it must be enabled manually. Follow the steps below to enable the WSL in Windows.
Method 1: Enabling WSL using PowerShell with Administrator rights
Step 1: Open PowerShell as “Administrator”
Step 2: Run the following command
Enable-WindowsOptionalFeature -Online -FeatureName Microsoft-Windows-Subsystem-Linux
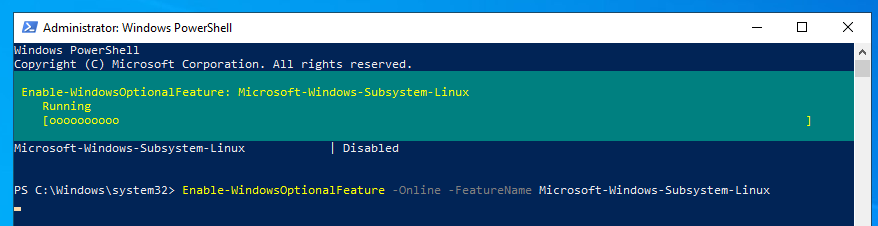
Step 3: Wait for the process to end and Restart the computer when prompted
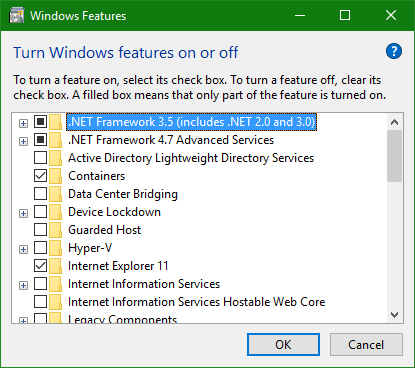
Method 2: Enabling WSL using Windows Features (GUI)
Step 1: Open the advanced Windows Feature list
Step 2: Go to “Control Panel”, then “Programs and Features”
Step 3: Select “Turn Windows features on or off”
(Note: If you don’t have Administrative rights on the PC, then try the above mentioned PowerShell method or contact your system administrator or IT)
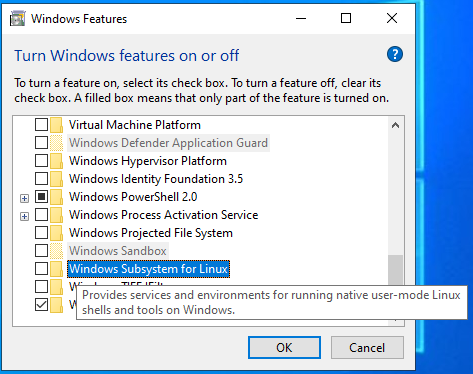
Step 4: Enable “Windows Subsystem for Linux”
Step 5: Wait for the process to end and Restart the computer when prompted
Installing X Server software (on Windows 10)
The previous steps give access to only command line version of Ubuntu (or whatever distro you installed) natively on Windows. It can be used like most other apps in Windows. However, in order to run GUI applications in WSL, you need to first install an X Server on your Windows machine. Microsoft Windows is not shipped with support for X server, but many third-party implementations exist, such as Cygwin/X or Xming or MobaXterm or VcXsrv (free version), and proprietary products such as Exceed, MKS X/Server, Reflection X, X-Win32.
Step 1: Download Xming from https://sourceforge.net/projects/xming/ on to your Windows 10 machine
Step 2: Install the Xming by running “Xming-6-9-0-31-setup.exe” file
Step 3: Reboot the system and after rebooting start the Xming software. Confirm that Xming is running in Windows Taskbar (will show up as Xming Server:0.0, when you hover mouse on the icon).
Installing Linux Distro of your choice
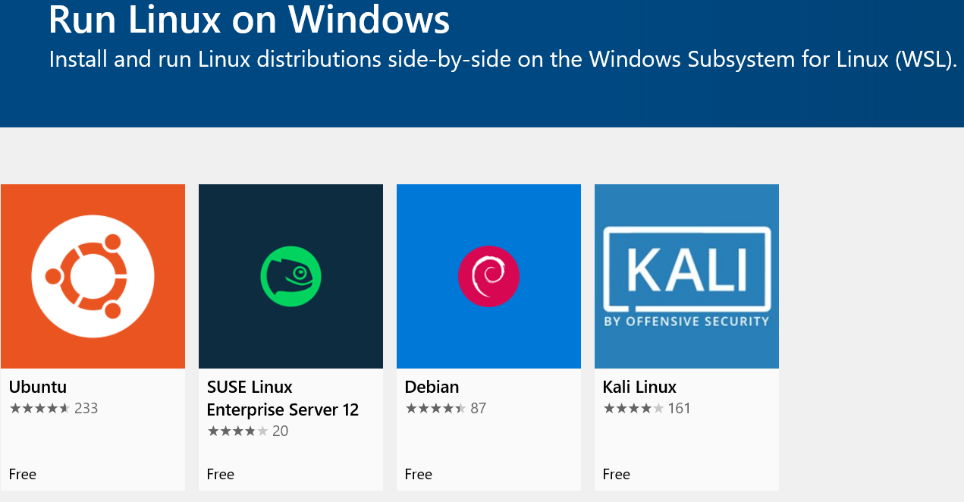
Download and install your favorite flavor of Linux distribution from the Windows Store.
Step 1: Open the Windows Store, search (top right corner) for “Linux”
Step 2: Click on “Get the apps”
Step 3: Download the Linux distribution you prefer for your work (Ubuntu 18.04 version is recommended if you do not have a reason to pick another distribution. If you choose a different Linux distribution, some of the following instructions may not completely apply)
If for some reason, the network you’re connected does not allow access to “Microsoft Store”, then you can manually download the Linux distro’s at https://docs.microsoft.com/en-us/windows/wsl/install-manual (e.g. Ubuntu 18.01 version is CanonicalGroupLimited.Ubuntu18.04onWindows_1804.2018.817.0_x64__79rhkp1fndgsc).
Post Installation Setup (inside Linux)
Step 1: Launch your distribution of Linux (via Start Menu or Microsoft Store)
Step 2: Wait for installation to finish, until it shows the following window
Step 3: When prompted create a username and password

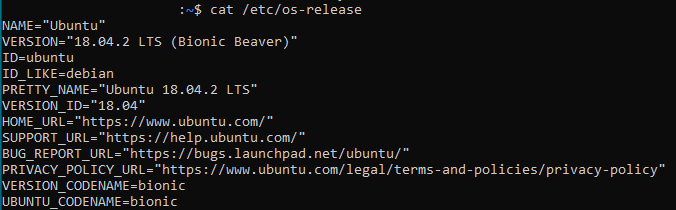
Step 4: Check the Linux version installed (type into the terminal)
cat /etc/os-release
For example, output for Ubuntu 18.04 Linux distro is shown below
Step 5: Update the system with latest distro repositories by entering the following commands
sudo apt update
Step 6: Get the wget and unzip packages by using following command
sudo apt-get install unzip wget
Step 7: Get the build-essential tools (The build-essential package contains important development tools including the gcc compiler)
sudo apt-get install build-essential
Step 8: Get latest ca-certificates
sudo apt-get install ca-certificates
GPI installation and testing
In order to install GPI, first you need to get the installation script from the GPI website (http://gpilab.com/downloads/) and then run the script in the Linux distro (this case it is Ubuntu) installed using the steps above.
Obtaining the GPI install script
Step 1: Launch your distribution of Linux (via Start Menu)
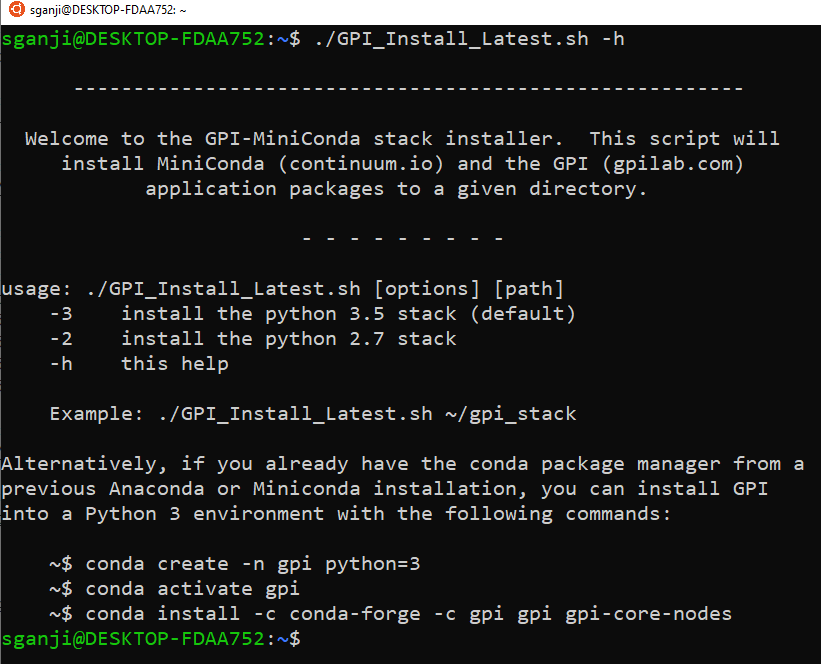
Step 2: Get the latest GPI installation script from http://gpilab.com/downloads/ using
wget https://raw.githubusercontent.com/gpilab/conda-distro/master/GPI_Install_Latest.sh
(Note: this script will work only for Linux distros and macOS version 10.09 or above)
Installing GPI
Step 1: Elevate the privileges of “GPI_Install_Latest.sh” shell script
chmod +x GPI_Install_Latest.sh
Step 2: Execute the shell script “GPI_Install_Latest.sh”
./GPI_Install_Latest.sh ~/gpi_stack
(Note: if you need help, you see the help text by ./GPI_Install_Latest.sh -h)
Step 3: If the GPI install is successful you will get the following message in the terminal
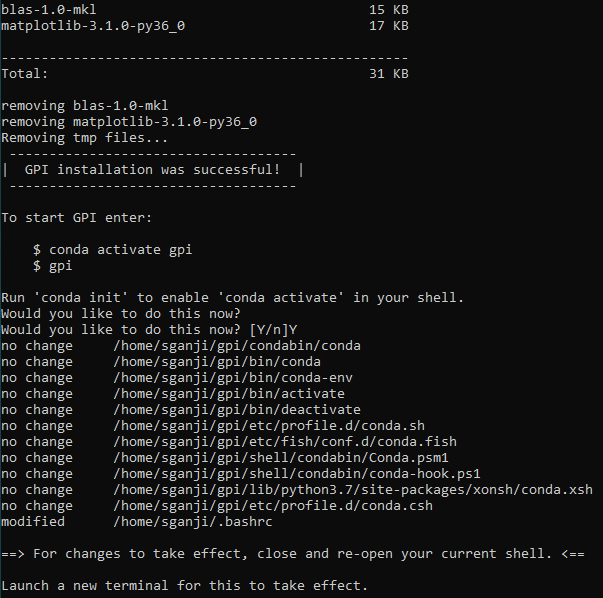
Step 4: Close the WSL terminal (by using exit command)
Testing the GPI GUI
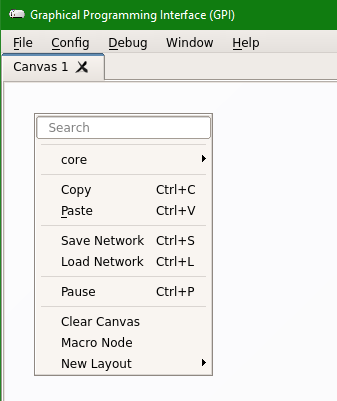
The main GPI workspace is the canvas, which can be loaded by running the following commands. It gives access to the core gpi nodes and can be used to build algorithms. Make sure the Xming server or your preferred Windows X Server is running.
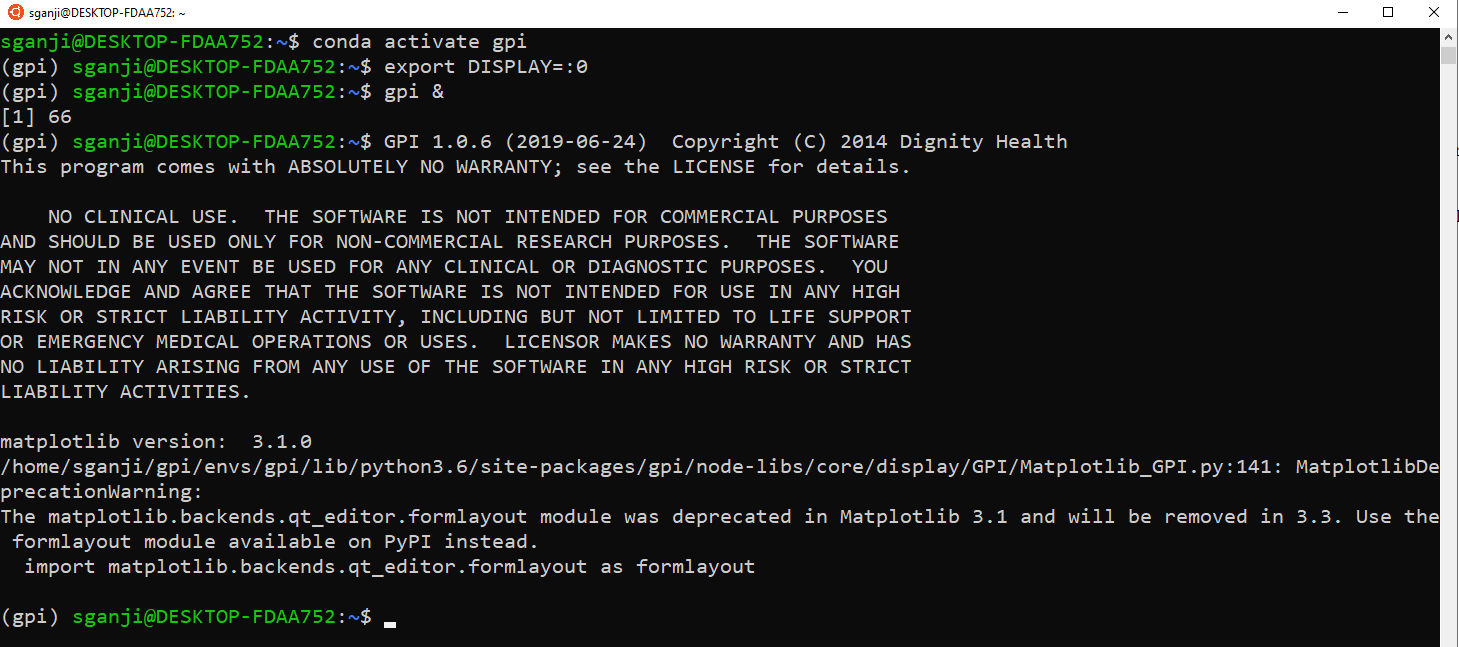
Launch your distribution of Linux (via Start Menu). Run the following commands in the Ubuntu Terminal (see the screenshot below that shows the outputs)
conda activate gpi
export DISPLAY=:0
gpi &
Obtaining and configuring the readPhilips nodes
Description
The “readPhilips” nodes are GPI nodes that are binary distributions for reading Philips MR data. Current supported formats include rawdata (LAB/RAW/SIN, DATA/LIST, CPX), and imaging & spectroscopy data (e.g. DICOM, par/rec, sdat/spar). For more information visit https://github.com/gpilab/philips-data-reader. The below steps assume a working GPI already exists and has all the gpi-core-nodes are installed.
Installation of the nodes in GPI
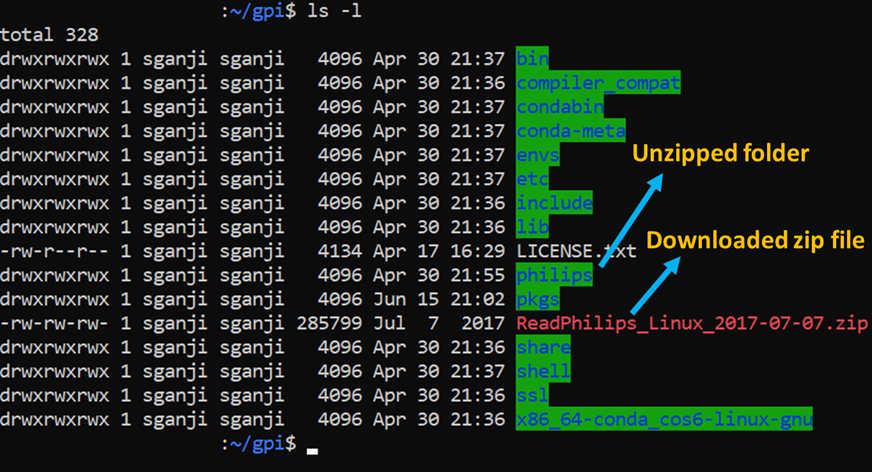
Download the latest release binary (pre-compiled) files corresponding to the installation of GPI platform (Linux or macOS X) to the default GPI library directory (or a directory that is in your LIB_PATH, as shown in the configuration documentation), unzip and restart GPI.
For example, from the Ubuntu terminal
cd /home/**user**/gpi/
(here user is the name of your user directory)
wget https://github.com/gpilab/philips-data-reader/releases/download/v1.0.6/ReadPhilips-GPI-Linux-Python36-2019-07-15.zip
unzip ReadPhilips-GPI-Linux-Python36-2019-07-15.zip
(this will unzip a folder called ‘philips’ in /home/user/gpi, precise naming here is important for GPI to load the modules properly. Note that there may be new readphilips nodes or networks in the future)
Confirming the read philips nodes in GPI canvas
To confirm that the nodes are installed and working, you can do the following simple test.
Step 1: Start the X server application (Xming in this case)
Step 2: Start the Linux (Ubuntu 18.04 in this case) terminal and run the following commands in the terminal window
conda activate gpi
export DISPLAY=:0
gpi &
Step 3: Once the GPI canvas is open, “Right Click” on the canvas to open a menu and it should show “philips” option under the “core”. Any other GPI libraries you create or install will also show up here.
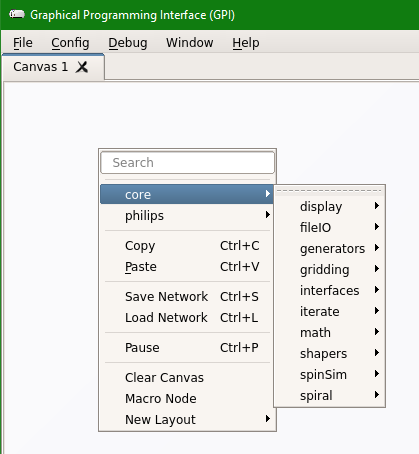
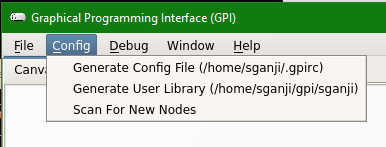
Step 4: If you do not see the “philips” option, then in the Menu options at the top, click on “Config” and then click on “Scan for New Nodes” and then check the menu again for “philips” option
Data conversion networks
The latest GPI network files (*.net) for converting reading and converting the Philips MR data from GitHub are included in the readphilips nodes zip file (inside the \~/gpi/philips folder).
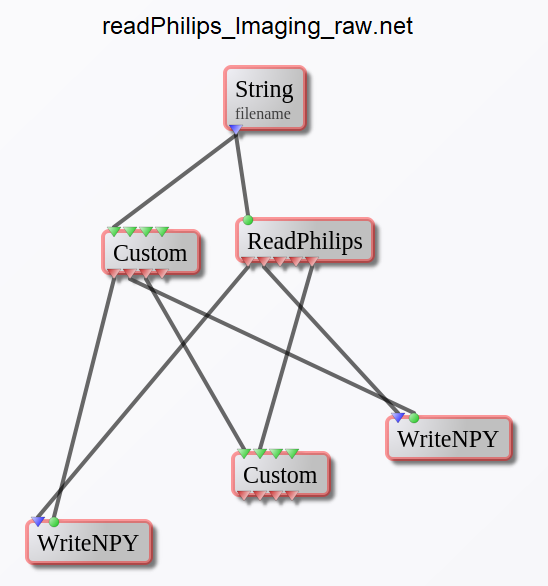
readPhilips_Imaging_raw.net
This network is designed to read and convert the Philips MR imaging data (LAB/RAW/SIN, DATA/LIST, CPX) to NumPy data format (*.npy files) and header information into a Python dictionary (saved on-disk as a *.pickle file).
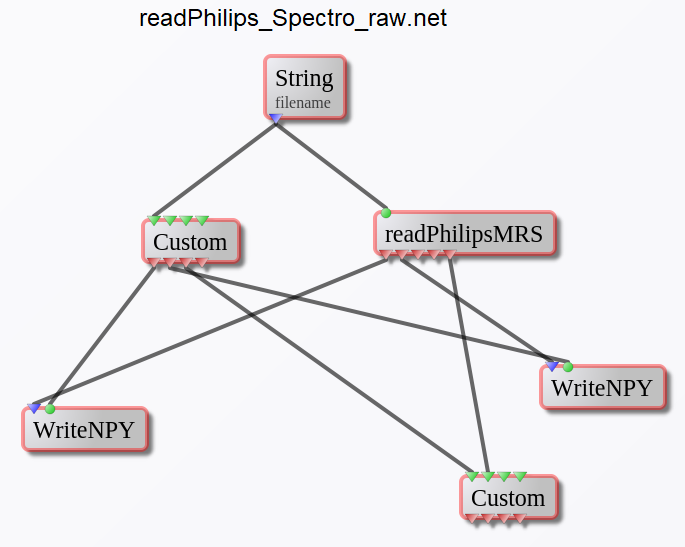
readPhilips_Spectro_raw.net
This network is designed to read and convert the Philips MR spectroscopy data (LAB/RAW/SIN, DATA/LIST, CPX) to NumPy data format (*.npy files) and header information into a Python dictionary (saved on-disk as a *.pickle file).
Running the data conversion networks and validating the output
Philips raw data conversion using Linux command line
The rawdata that needs to be converted can be anywhere in the system (host or in the linux). For WSL, all the drives can be accessed by /mnt directory inside the Linux environment. Once you have the location of the data on the windows you can use that as a path in the Linux terminal.
Step 1: Start the X server application (Xming in this case)
Step 2: Start the Linux (in this case Ubuntu 18.04) terminal and run the following commands in the terminal window
conda activate gpi
export DISPLAY=:0
Step 3: For imaging raw data you can use the readPhilips_Imaging_raw.net
gpi /home/sganji/gpi/philips/readPhilips_Imaging_raw.net --nogui -s filename:/mnt/drive_letter/path_of_rawdata_files/Filename.raw
Or
Step 3: For spectroscopy raw data you can use the readPhilips_Spectro_raw.net
gpi /home/sganji/gpi/philips/readPhilips_Spectro_raw.net --nogui -s filename:/mnt/drive_letter/path_of_rawdata_files/Filename.raw
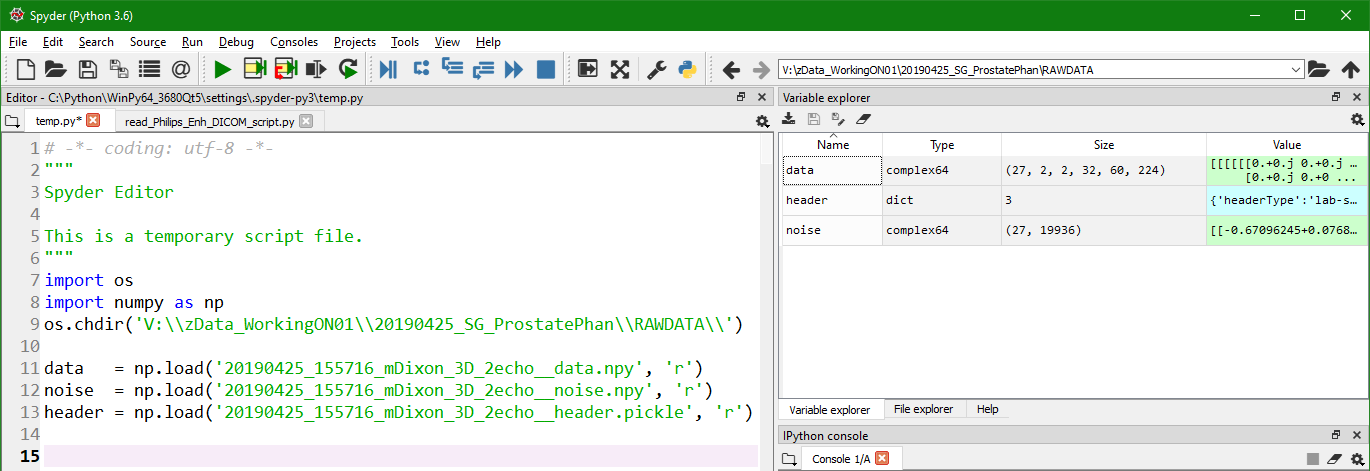
Validating the output NumPy files (checking the dimensions, and labels)
One can validate the output NumPy files using a python IDE. Load the data using NumPy package.
For example, using Spyder (https://www.spyder-ide.org/) one can check the output files of a mDixon dataset.
Input files 20190425_155716_mDixon_3D_2echo.raw 20190425_155716_mDixon_3D_2echo.lab 20190425_155716_mDixon_3D_2echo.sin
Script
gpi /home/sganji/gpi/philips/**readPhilips_Imaging_raw.net** --nogui -s filename:/mnt/v/zData_WorkingON01/20190425_SG_ProstatePhan/RAWDATA/20190425_155716_mDixon_3D_2echo.raw
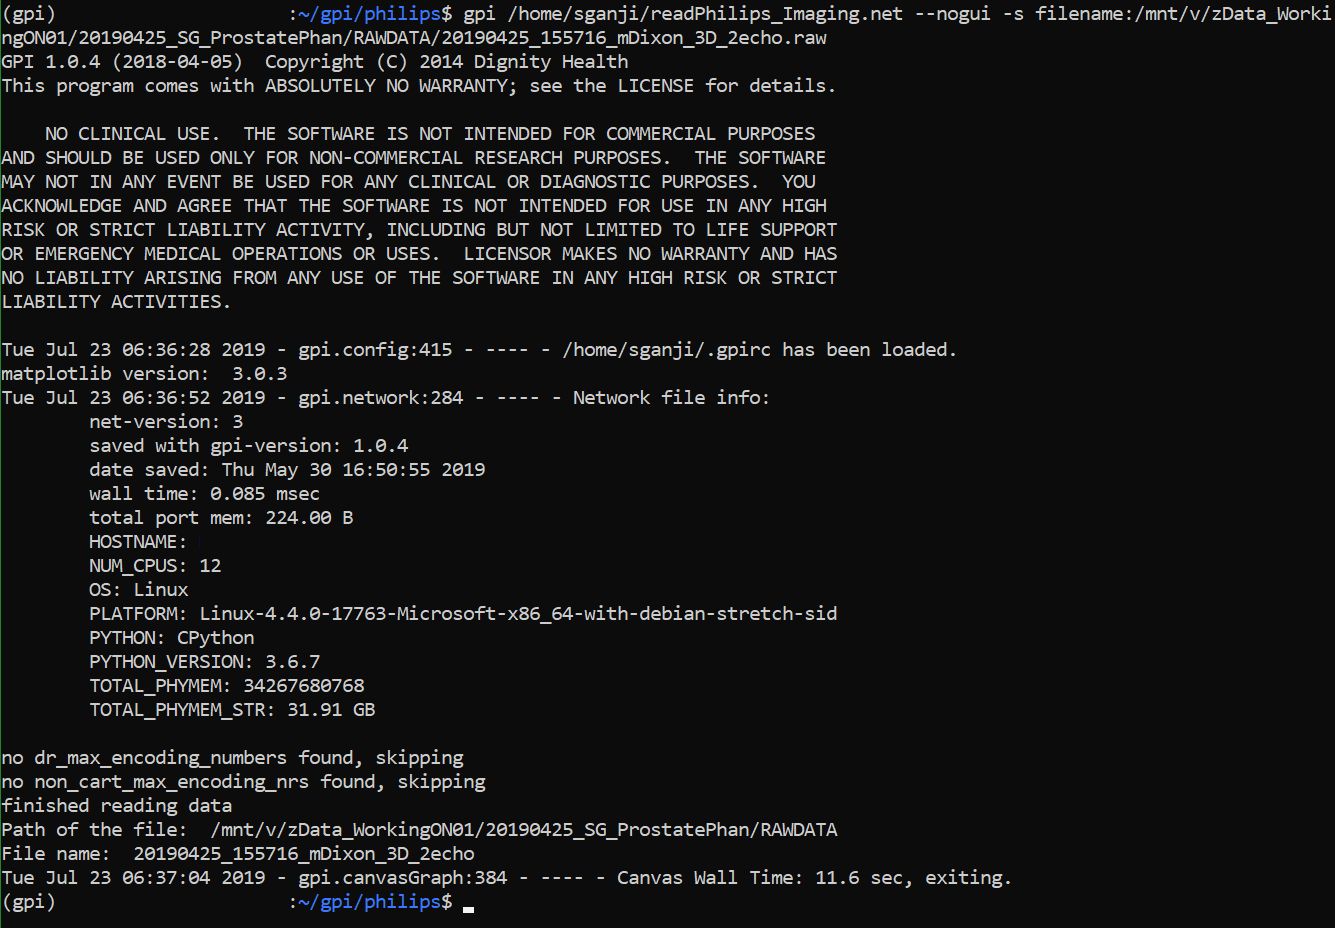
Output files 20190425_155716_mDixon_3D_2echo__data.npy - Data is a NumPy array with dimensions [27 x 2 x 2 x 32 x 60 x 224] 20190425_155716_mDixon_3D_2echo__header.pickle - Contains header information in the form of a dictionary (from both .lab and .sin files) 20190425_155716_mDixon_3D_2echo__noise.npy - Noise is a NumPy array with dimensions [27 x 19936] (this is 27 channels noise data)
Known issues and bugs
GPI and its Philips networks are constantly being developed and improved by GPI and Philips team. If you find any bugs or have questions, please reach out to GPI team on the GitHub (use the issue tracker) or email Sandeep Ganji (Sandeep.Ganji@philips.com).
Multi-Nuclear MR Spectroscopy
We have noticed some failures when converting the multi-nuclear spectroscopy rawdata. So please check the output data, if it converts, for dimensionality and continency. If the data fails to convert at all, please let us know and we can improve the functionality based on your inputs.
Certificate issue when using wget
When downloading the installation script, if one gets the following ca-certificates error
ERROR: The certificate of ‘raw.githubusercontent.com’ is not trusted.
ERROR: The certificate of ‘raw.githubusercontent.com’ hasn't got a known issuer.
They should install the latest ca-certificates using the following command
sudo apt install ca-certificates
Atypical sequence data
For raw data from a newly development sequence, where the dimensions are either improbably labelled or new reconstruction labels were created, then the above conversion may fail.
Author
Sandeep Ganji Contributions from Daniel Borup and Ashley Anderson
Legal Disclaimer
THE SOFTWARE AND INSTRUCTIONS ARE PROVIDED "AS IS", WITHOUT WARRANTY OF ANY KIND, EXPRESS OR IMPLIED, INCLUDING BUT NOT LIMITED TO THE WARRANTIES OF MERCHANTABILITY, FITNESS FOR A PARTICULAR PURPOSE AND NONINFRINGEMENT. IN NO EVENT SHALL THE AUTHORS OR COPYRIGHT HOLDERS BE LIABLE FOR ANY CLAIM, DAMAGES OR OTHER LIABILITY, WHETHER IN AN ACTION OF CONTRACT, TORT OR OTHERWISE, ARISING FROM, OUT OF OR IN CONNECTION WITH THE SOFTWARE OR THE USE OR OTHER DEALINGS IN THE SOFTWARE.
References and Sources
Linux on Windows
- https://blogs.msdn.microsoft.com/wsl/2016/04/22/windows-subsystem-for-linux-overview/
- https://docs.microsoft.com/en-us/windows/wsl/about
- https://docs.microsoft.com/en-us/windows/wsl/install-win10
- https://docs.microsoft.com/en-us/windows/wsl/install-manual
- http://wsl-guide.org/en/latest/index.html
GPI (Graphical Programming Interface)